A comprehensive guide on all stages of lawn mower maintenance, with lots of useful tips on what needs to be done.
A guide to the main Lawn mower Maintenance operations.
The lawnmower is certainly the most popular and well-known machine for classic lawn mowing in our homes, but what routine and non-ordinary maintenance does it require?
In this guide we will conduct a complete overview of its maintenance and care, to ensure optimal mowing performance throughout the season.
CONTENTS
- Lawn mower maintenance: Three phases
- 1. Maintenance for early season commissioning
- 2. Routine maintenance during the season
- 3. Maintenance for winter storage
- 4. Maintenance of Electric and Battery-powered Lawn Mowers
- 5. Problems and solutions
- 6. Tools required for maintenance
- 7. Frequently asked questions from our customers
Lawn mower maintenance: Three phases
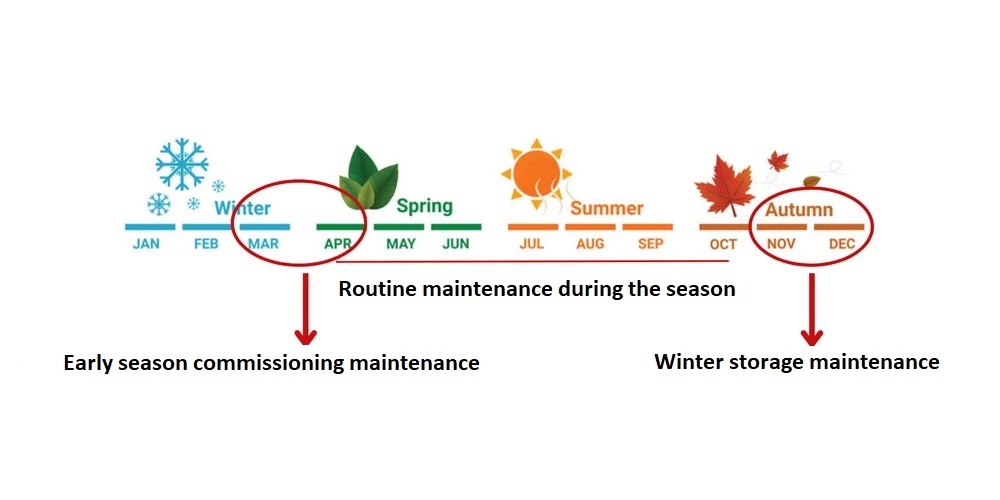
The maintenance phases of a lawn mower during the cutting season can be divided into three main stages:
- Maintenance for early season commissioning: Maintenance required to get the mower back on track after the winter inactivity;
- Routine maintenance: Maintenance to be carried out regularly during the season;
- Maintenance for winter storage: Maintenance to be carried out before storing the machine for the winter months.

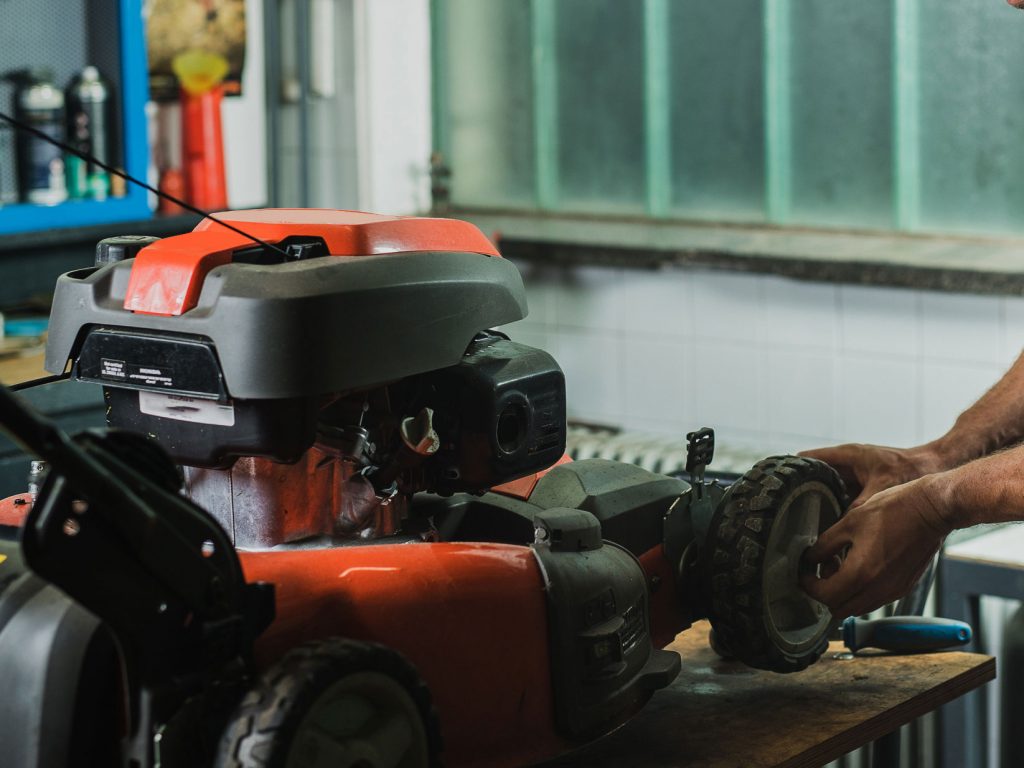
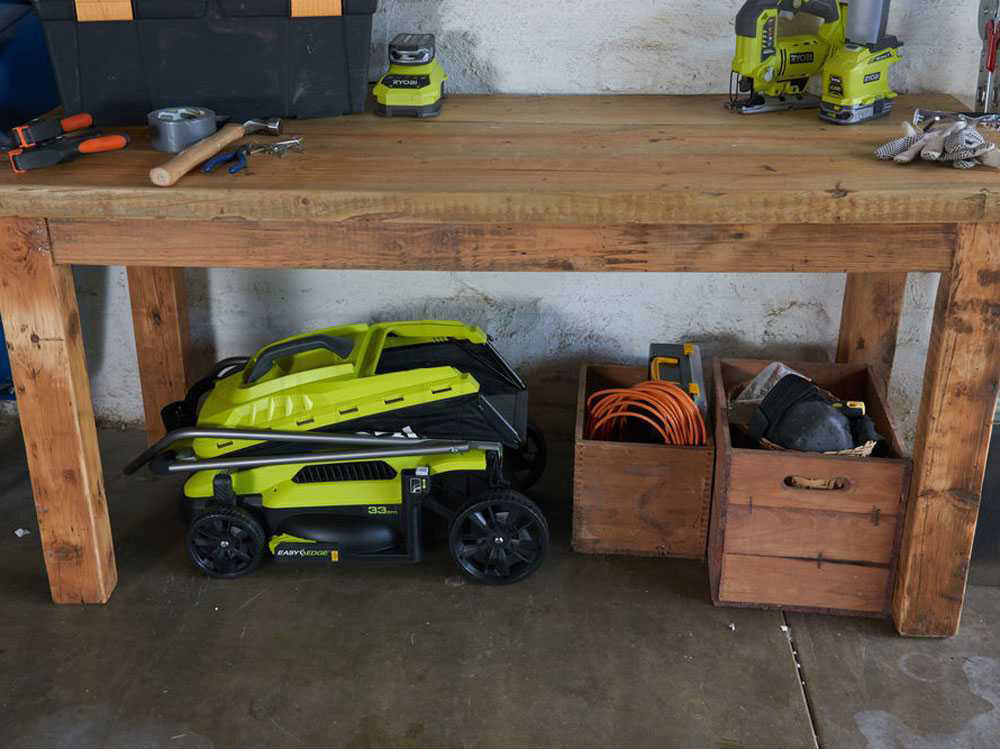
We will go through all the stages of maintenance, the periods in which they must be carried out and all the necessary work, starting with maintenance for the start of the season and ending with winter storage.
1. Maintenance for early season commissioning
We are between the end of March and the beginning of April, spring is finally coming and it’s time to get your lawn mower back on track, what should you do to prepare it for the new season?
This is perhaps the most delicate maintenance phase, especially for internal combustion models, since we are dealing with a machine that has been left idle and unused for months, so let’s take a look at all the work to be done before starting our mower again:
- Fuel renewal;
- Changing engine oil;
- Replacing the air filter;
- Replacing the spark plug.
1.1 Fuel renewal
One of the very first things to do is certainly to replace or renew the fuel.
In the section on maintenance before winter storage we will specifically discuss the importance of not leaving fuel in the tank throughout the winter.
If this step is followed, the tank will only have to be refilled at the beginning of the season.
If, on the other hand, we have left last season’s fuel stored for the entire winter, the first thing to do is to replace it with new one.
1.2 Changing engine oil
Let’s start with the premise that maintenance, be it ordinary or non-ordinary, concerning engine oil is essential in order not to cause often irreparable damage to the engine.

Changing the oil regularly is, in fact, an extremely critical phase for the health and performance of the combustion engine.
In early-season maintenance, the oil must be changed, even if the machine has not been used for a long time, since an oil that has been left idle for a long time loses many, if not all, of its lubricating properties.
When should the lawn mower’s oil be changed?
The engine oil should be changed after the first 8 hours of use and at least every 50 hours thereafter. One possible variable may be the type of strain placed on the engine; in the case of demanding mowing sessions or high outside temperatures, it may need to be replaced even earlier.
In addition to its replacement, it is also essential to constantly check its level and, if necessary, top it up periodically.
A correct engine oil level is important, as too low an amount can cause very serious engine damage due to poor lubrication, while too high an amount can cause air bubbles to form and likewise result in poor lubrication of the various engine parts and components.
The oil to be used for the machine, the recommended frequency of its replacement and the procedure for doing so, is all information that can be found in the mower’s instruction manual.
Let us now look at all the steps to perform this operation correctly, which can be carried out using two different approaches: using an oil pump or tilting the machine.
Changing engine oil with an oil pump:
- Remove filler cap and dipstick;
- Use the pump to drain the oil. When finished, clean the nozzle to prevent spills;
- Check that all oil has been removed;
- Refill with new oil of the type and quality indicated in the product manual.
Changing the engine oil by tilting the mower:
- Make sure the fuel tank is completely empty;
- Remove filler cap and dipstick;
- Place a container under the mower;
- Tilt the machine to drain the engine oil;
- Refill with new oil of the type and quality indicated in the product manual with the machine placed in a flat position.
Which side should the mower be tilted to?
To prevent accidental oil spillage onto the spark plug and adjacent areas, always tilt the machine to the side indicated in the mower manual.
1.3 Checking the air filter
The inspection and eventual replacement of the mower’s air filter is essential for proper engine operation.
A damaged or excessively worn air filter can lead to start-up problems and sudden power loss.
The air filter acts as a barrier, thus preventing dirt from entering the engine. Consequently, an old filter cannot filter out all dirt particles while the machine is in use.
The filter is usually located on the sides of the engine and is protected by a metal or plastic guard.
At the beginning of the season, it is therefore very important to check its condition for dirt or wear; often a simple cleaning may be enough.
If, on the other hand, the air filter is found to be damaged or too worn, it must be replaced.
There are two different types of air filters:
- Paper air filter;
- Foam air filter.
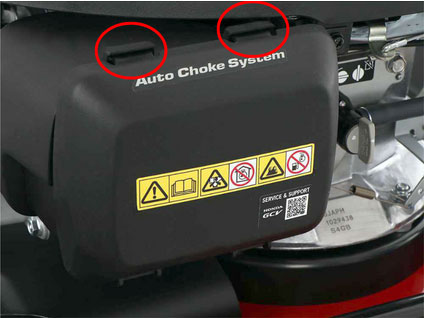
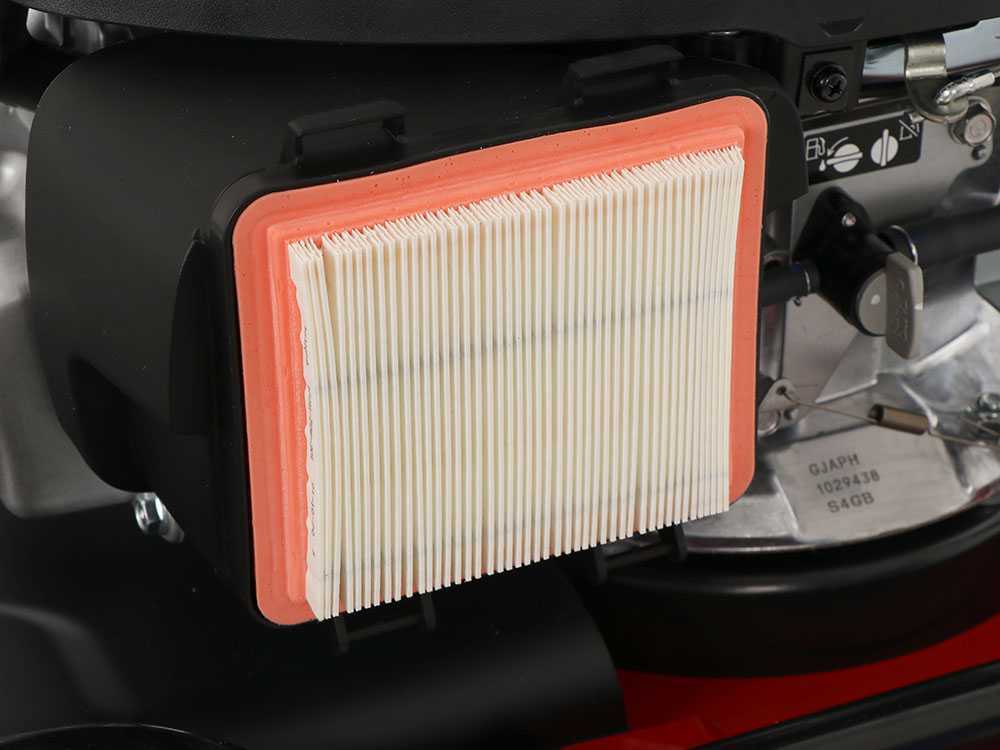
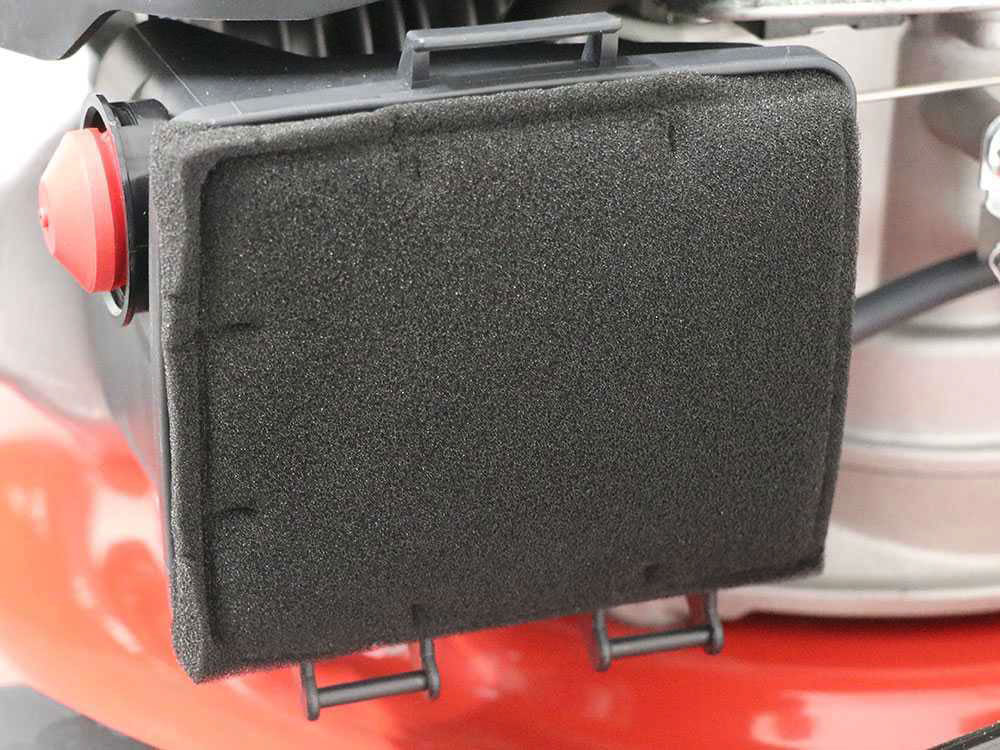
How to replace the air filter?
- First, the protective casing must be removed by unscrewing the fasteners on its upper part (the parts marked in red);
- The filter must be removed from its housing and replaced with a new one;
- Once the filter has been replaced, the protective casing must be closed again, locking the clips again.
1.4. Checking the spark plug
Being sure to use a spark plug in good condition is essential to ensure optimal performance.
A dirty, worn spark plug can cause starting problems and sudden drops in power.
When to replace the spark plug?
When the engine shows clear signs of malfunction, like difficulty starting or irregular idling of the engine.
Similar to the air filter, there are two possible scenarios with the spark plug:
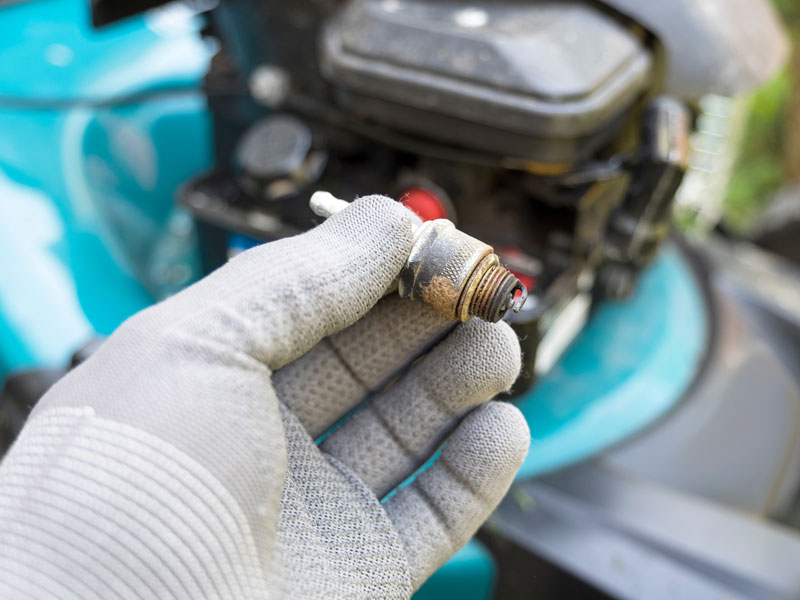
- At the beginning of the season, it is possible to find a dirty spark plug or one with surface incrustations. The way it has been stored during winter also has a great influence, in which case it can simply be cleaned with a brush or an oil-soaked cloth;
- Alternatively, a spark plug in bad condition or even damaged, in which case it should be replaced accordingly.
How to replace the spark plug of a lawn mower?
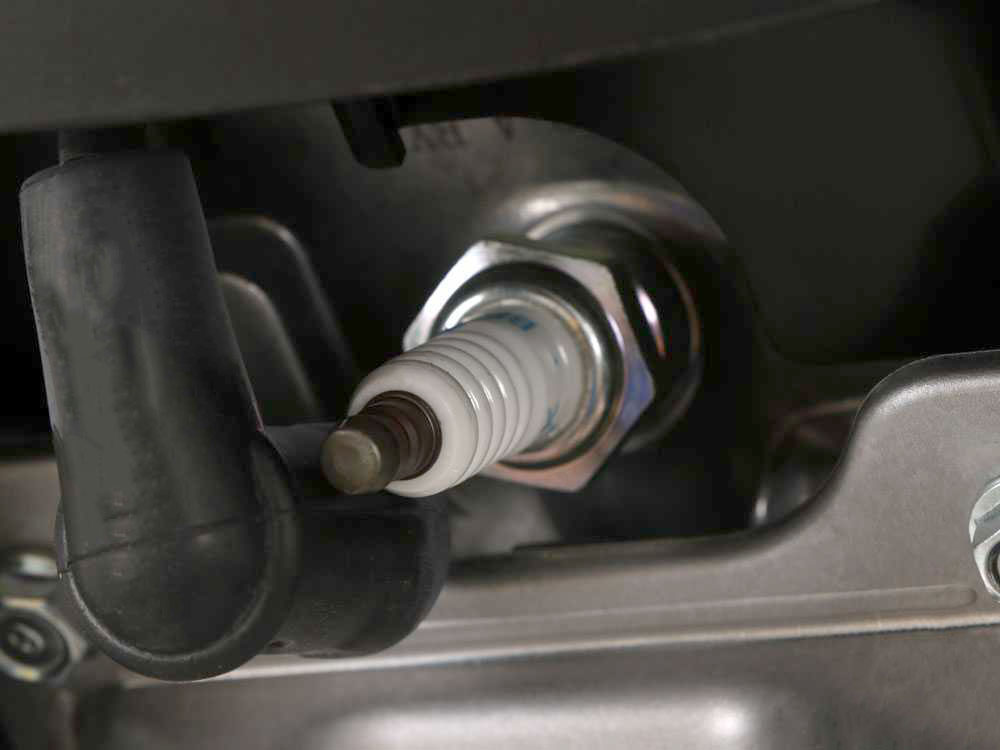
- Locate the spark plug, which is located near the engine compartment;
- Remove the spark plug using the appropriate jointed spanner. To unscrew it, perform an anti-clockwise movement. The spark plug, especially if it has never been removed, will resist the action of the spanner slightly. At this stage it is important to make firm, but not too vigorous movements, otherwise you risk breaking the top of the spark plug;
- Once removed, it can be replaced with a new one;
- Place the new spark plug in its compartment and proceed with an initial manual rotation, and then tighten correctly using the jointed spanner;
- It is also important to make sure that the spark plug is inserted correctly, in order to avoid serious damage to the engine.
2. Routine maintenance during the season
In this chapter, however, we discuss routine maintenance tasks, i.e. those to be carried out regularly throughout the working season of the mower.
Routine maintenance operations are:
- Air filter efficiency check;
- Spark plug efficiency check;
- Collection system cleaning;
- Body and blade plate cleaning.
2.1 Air filter efficiency check

The filter purifies the carburettor air, which is why it should be checked and cleaned regularly.
Checking its condition is important to ensure the proper functioning of the engine.
A clogged filter prevents the engine from getting the air it needs, impeding the proper ignition process.
That is why it is important to check its condition periodically and clean it at least every 10-15 working hours.
How to clean the air filter of a lawn mower?
For optimal cleaning, simply blow it with the air from a compressor.

A tip for this operation is to blow from the inside outwards, so that impurities do not remain in the filter.
In the case of a foam filter, on the other hand, it can be cleaned with liquid soap and water, and once completely dry, it can be put back in place.
2.2 Spark plug efficiency check
Checking the efficiency of the spark plug is another routine maintenance task that should be carried out to avoid start-up problems.
It is recommended to check its condition at least every 25 working hours.
In order to produce the spark necessary for starting, the electrodes on the spark plug must be clean and sharp.
A clear sign of a dirty or damaged spark plug can therefore be the need to try several times to start the machine.
If a dirty spark plug contains encrustations or oil residue, clean it with a special brush with steel bristles and a special spark plug cleaner spray.

How to reduce dirt build-up on the spark plug?
- Check that the fuel is correct;
- Check that the oil used is at the correct level;
- Make sure that the ignition cable is correctly connected with no residue in the vicinity;
- Avoid excessive side tilts;
- Check that the air filter is clean.
During this operation, one must not only focus on cleaning the spark plug specifically, but also the area around it, in order to prevent residue and dirt from ending up in the combustion chamber once the spark plug is removed.
2.3 Cleaning the collection basket
Another important routine maintenance task is to check the integrity and cleanliness of the collection system, which should also be performed after each mowing session.
For this maintenance task, remove the collection system, which is among the parts most prone to dirt and wear from work sessions.

To clean a hard plastic basket, simply use a jet of compressed air or a jet of running water to remove accumulations of freshly cut grass and other residues, such as soil or small pieces of wood, which would become encrusted over time.
For canvas baskets, on the other hand, it is important to allow the water to pass correctly through the various micro-slots, otherwise the basket will tend to swell irregularly with the accumulation of working hours.
2.4 Sharpening the blades
During the maintenance season of your lawn mower it is also important to regularly check the sharpness of the blades.
If the sharpness starts to be less efficient, you will notice a much less precise and smooth cut, as well as greater difficulty when mowing.
Sharpening restores the ideal cutting angle of the blade, which for optimal grass mowing is generally between 30° and 40°.
How to sharpen blades?
There are not many procedures, but they must be performed correctly and always with the proper tools and protection:
- First, disconnect the spark plug of the lawn mower;
- Then the machine must be placed on its side, which as already mentioned in the chapter on changing engine oil must be the correct one to avoid accidental oil or fuel spills;
- You can now proceed to remove the blades. In newer lawn mower models, this can be performed without tools, while in older models it may be necessary to secure the blade first.
- Once you make sure the blade is properly cleaned, you can proceed with sharpening, which can be performed either by hand or with a sharpening machine.
- Once sharpening is complete, remount the blade.
Why is it important to stay between these two cutting angles?
Angles of less than 30° will result in a better cut but a shorter blade life, angles above 40° will result in a longer blade life but a lower quality cut.
Although lawn mower blades are not tools that require precision cutting, it is not enough just to keep them sharp and regularly reset their correct cutting angle, they must always be balanced.
This prevents excessive or accidental vibration and damage to the motor during continuous use of the machine.
2.5 Checking and Cleaning the belt compartment
Checking and cleaning the belt compartment is a very important lawn mower maintenance task, but one that is often forgotten or skipped due to its not immediately obvious location.
It is placed under the cutting deck, next to the mulching blades, and is in fact difficult to reach precisely because it is located under the machine body near the mower’s cutting system.
A damaged belt compartment or one with an excessive dirt build-up can cause the belt itself to be damaged or accidentally come off.
When should the belt compartment be serviced?
It should be checked at least every 20-30 operating hours.
2.6 For maintenance maniacs…
Are you a maintenance maniac and do you like to take care of your lawn mower down to the last detail to the point of fanaticism?
Then this chapter is for you…
Here are the specifics for a complete maintenance of your lawn mower without overlooking any aspect.
For frequent maintenance, the operations are:
- General inspection of the machine, ensuring that nuts and screws are properly tightened;
- Proper arrangement of the various electrical cables;
- Oil level check;
- Checking the condition of the air filter;
- Cleaning the body and the machine;
- Checking the state of the cutting deck;
- Checking the tightening of the blade on the hub;
- Checking the motor brake handle.
However, for precise maintenance about every 50 working hours, interventions are more targeted to the various parts of the machine:
- Changing engine oil;
- Cleaning or replacing the air filter;
- Checking the exhaust muffler;
- Cleaning the cooling flanges on the cylinder;
- Maintenance of the variable speed drive (where fitted).
3. Maintenance for winter storage
Once you reach the end of the season you come to the last stage of maintenance your lawn mower, that of preparing it for winter storage.
With proper maintenance at this stage we will be sure to have the mower in top condition again at the start of the next season.
The steps in this phase are:
- Emptying the tank;
- Removing the spark plug;
- Checking and cleaning the blade plate;
- Winter storage.
3.1 Emptying the tank
The first thing to do before winter storage is to empty the tank of its fuel.
This is because when petrol sits for long periods of time and especially when exposed to large temperature fluctuations, it creates condensation.
This condensation then mixes with the fuel itself and is the main cause of fouling.
Standstill throughout the winter months will also deposit sticky substances and residues harmful to the engine.

If you want to preserve it, add a suitable fuel stabiliser throughout the winter, otherwise new, fresh fuel must be added at the beginning of the next season.
Special plastic fuel canisters are available for proper storage.
These canisters are made of thick plastic to prevent accidental holes and are red coloured to prevent light penetration.
Advice: Once all the fuel has been drained, it is recommended to leave the mower running until it is switched off, to ensure that the old fuel does not remain in the engine’s inductors.
3.2 Checking and cleaning the blade plate
Before winter storage of your mower it is important to clean and check the condition of the cutting deck and blades.
Clean the body and housing of the mower at least every 25 hours of use; depending on the intensity and frequency of mowing, this time span may be reduced.
Regular cleaning facilitates maintenance of the mower and extends its life.
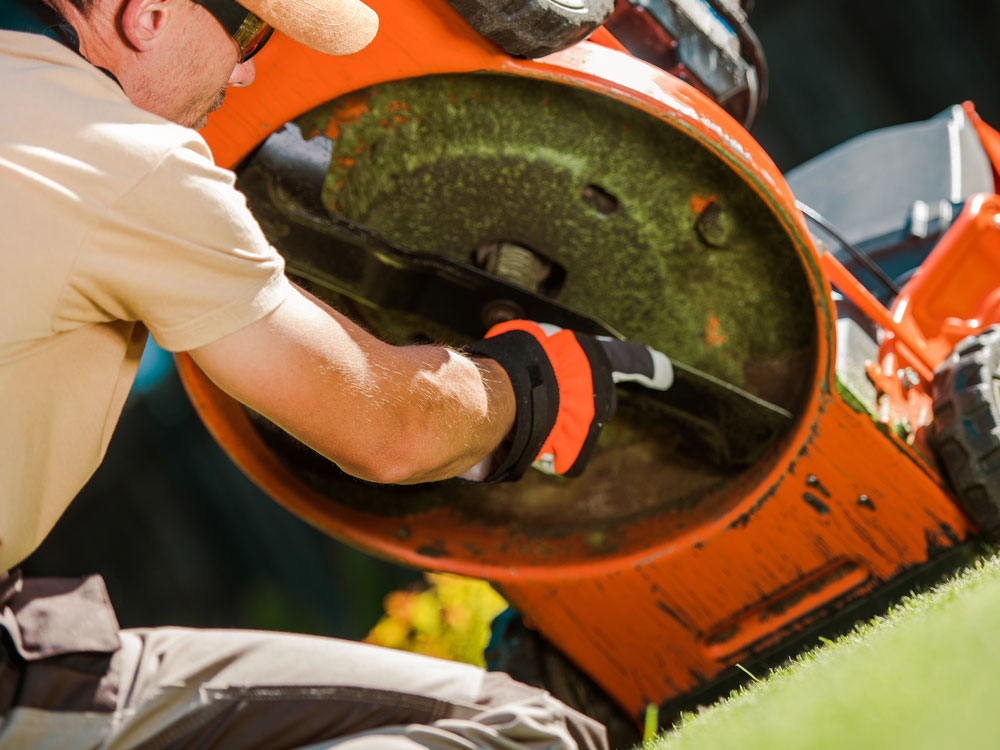
The steps for thorough and effective cleaning of the machine are always indicated in the manual.The first step is to place the mower in the indicated cleaning position, for petrol models make sure that the spark plug is facing upwards, to prevent any oil spillage causing damage to the engine.
For cleaning the underside, a brush or special scrapers with a curved shape can be used to easily reach every part of the cutting plate. Cleaning the body however is much easier if done immediately after a mowing session, as dirt and grass residues are still fresh and easier to remove.
Some lawn mower models feature a cutting deck with a washing connection to which a water hose can be attached so that the deck and blades can be washed with the mower placed on the ground.
This allows the water to be introduced into the connection while rotating the blades with the engine running for optimal washing.

Related to the cleaning stage is that of checking the blades and their state of wear.
These do not all wear out in the same way, several factors influence this aspect, such as the type of ground you work on and the duration of use.
If, during the inspection, the blades are in good condition, they only need to be sharpened; if, on the other hand, chipped parts or even cracks are visible, they need to be replaced.
When to sharpen the blades?
Lawn mower blades should be resharpened about every 20-25 hours of mowing or when necessary.
3.3 Winter storage
Lastly, you may proceed to winter storage.
The mower should be stored in a sheltered, dry and dust-free place, like a garage, and placed in its normal position of use.
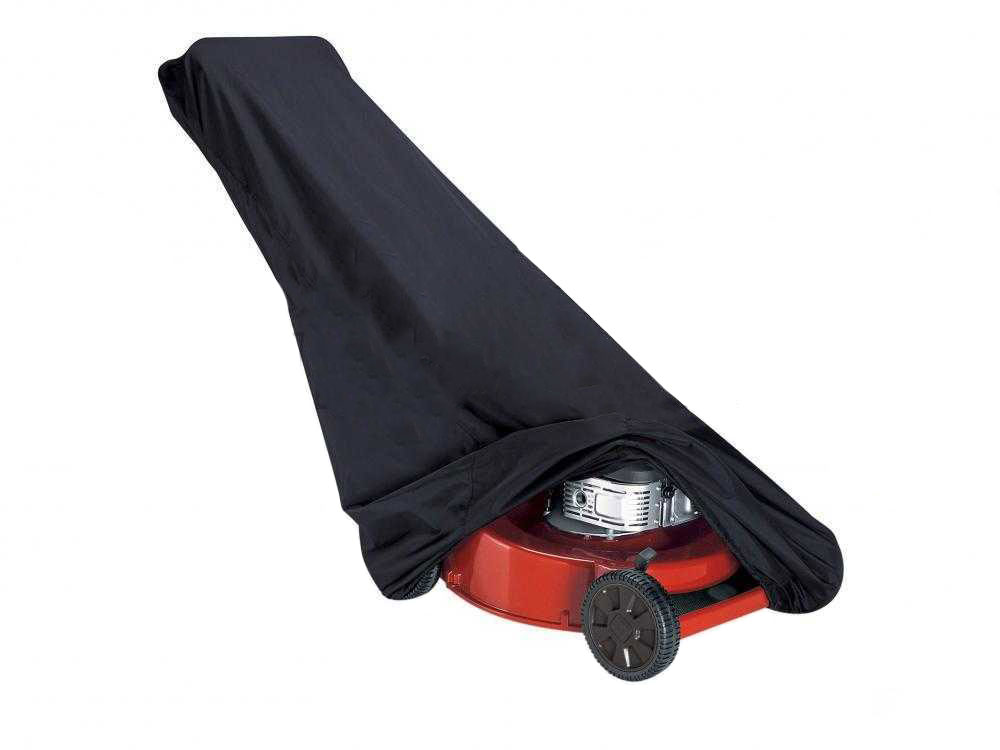
An excellent accessory to protect the lawn mower is the cover sheet, which is quick and easy to apply and protects it from dirt and moisture.

4. Maintenance of Electric and Battery-powered Lawn Mowers
Maintenance for 230 V electric lawn mowers and battery-powered lawn mowers is much less demanding than for petrol-engine models, with some common steps and specific precautions.
This is due to the lack of an internal combustion engine and consequently the presence of oil and fuel.

Without these elements we can summarise the maintenance of these models in:
- Removing the batteries;
- Checking the condition of the machine;
- Checking the condition of the wheels and the collection system;
- Storage in a covered, dry area, perhaps protected by a cover sheet.
| 230 V Electric lawn mower | Battery-powered lawn mower |
| Cleaning the body and blade plate | Removing the batteries from the machine |
| Cleaning the collection basket (when provided) | Cleaning the body and blade plate |
| Inspection and maintenance of cutting blades | Cleaning the collection basket (when provided) |
| Storing the machine in a covered and sheltered place | Inspection and maintenance of cutting blades |
| Storing the machine in a covered and sheltered place |
4.1 Cleaning Electric and Battery-powered models
The cleaning of these two categories of lawn mowers is very similar in many aspects to that of petrol mowers, but there are some fairly important differences that distinguish this phase:
As we have seen in previous chapters, in order to clean the blades and cutting deck of petrol mowers, it is crucial to correctly lift or tilt the machine to avoid accidental oil or fuel spills on the various engine parts.
For electric and battery-powered lawn mowers, on the other hand, this is not necessary, as they lack the motor and these components, and can therefore be lifted in any direction, obviously still appropriately.
The other important difference for cleaning these models concerns the possibility of using water.
For petrol models it is possible to use a jet of water to clean the body and cutting deck, for electric and battery models this is not possible, as water could penetrate the engine or other components and cause damage and short circuits.
5. Problems and solutions
| Problem | Cause | Solution | |
| Petrol mower | Difficult start-up | Old fuel | Use fresh or correctly stored fuel |
| Dirty or damaged spark plug | Check and, if necessary, replace the spark plug | ||
| Dirty air filter | Check and if necessary replace the air filter | ||
| Excessive smoke leakage | Bad carburation or excessive sideways inclination | ||
| Electric lawn mower | Failure to start up | Faulty on-off switch | Replace on/off switch |
| No power supply | Wiring or plug fuse | Check connection plug condition | |
| Battery-powered lawn mower | Failure to start up | Low or damaged battery | Check battery condition |
6. Tools required for maintenance
Let’s look at the main tools to be used for lawn mower maintenance:
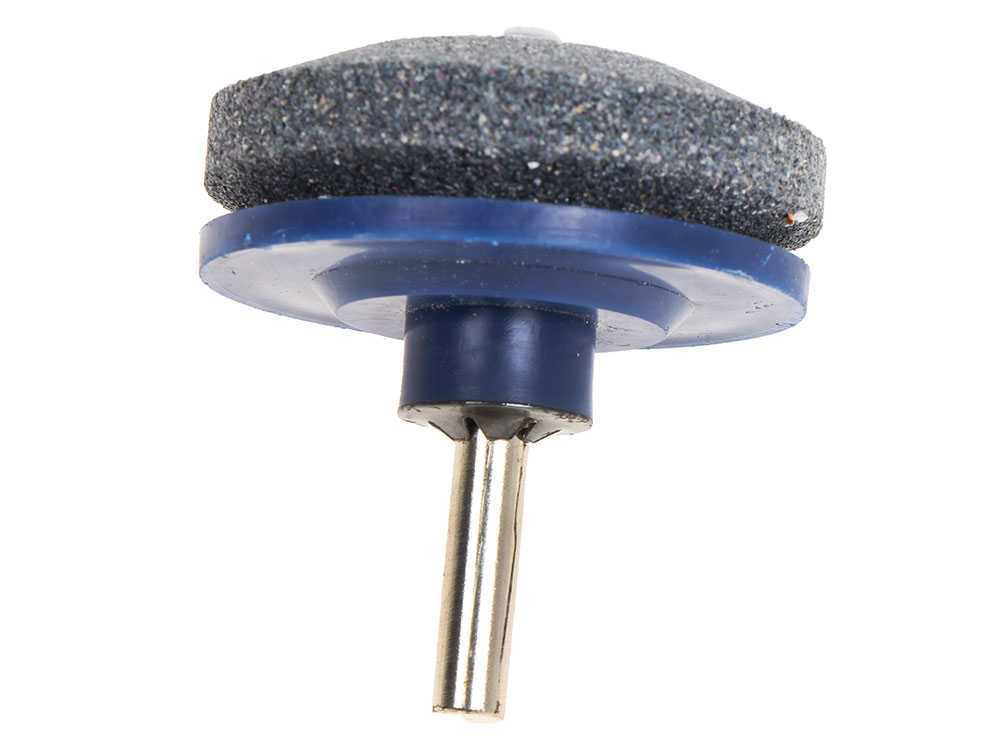
- The blade helps to sharpen the blades of the cutting deck quickly and easily.
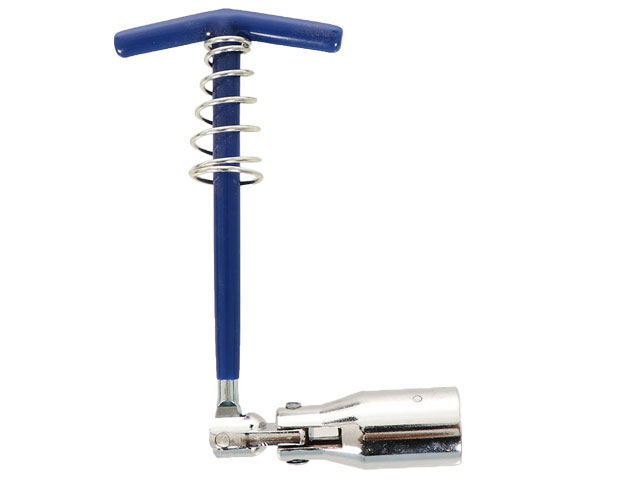
Connect it directly to the screwdriver or drill and it will be ready for use immediately. - The jointed spark plug spanner is used to remove and re-attach the spark plug. They differ in the size of the connections, according to which they fit the various spark plug models.
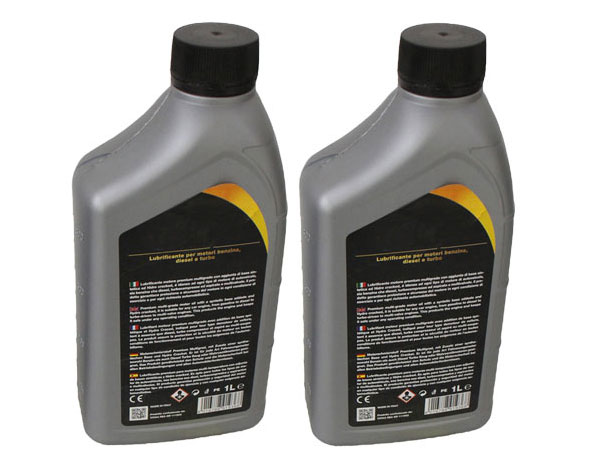
- Engine oil, which must be changed periodically, performs a lubricating and cleansing action.
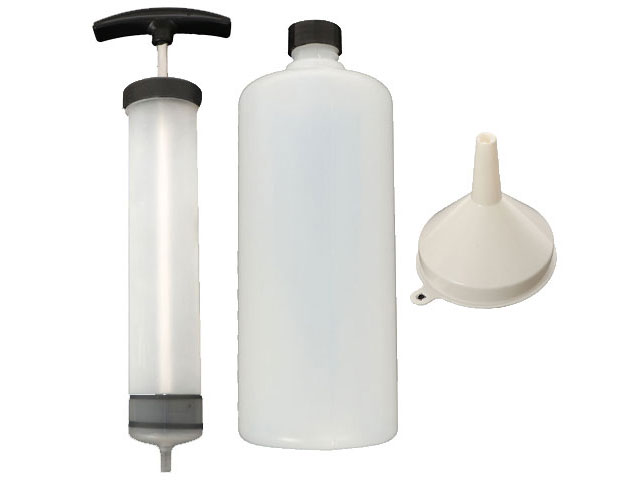
- The engine oil replacement kit includes a syringe for suctioning oil from the engine, a bottle for storing used oil for disposal and a funnel for replacement.
7. Frequently asked questions from our customers
The machine must be cleaned with a special brush, while the collection system can be cleaned with compressed air or a jet of running water.
Black smoke indicates poor carburation due to a dirty air filter.
The emission of white/blue smoke indicates that the engine is burning oil.
The ideal time is in the morning, making sure that the grass is not too wet.
But But there are no drawbacks if it is mown in the evening.
During the peak growth period, it should be mown every 6-7 days.


