A comprehensive guide to the maintenance of garden tillers and two-wheel tractors, with step-by-step explanations of the procedures and tools to use.
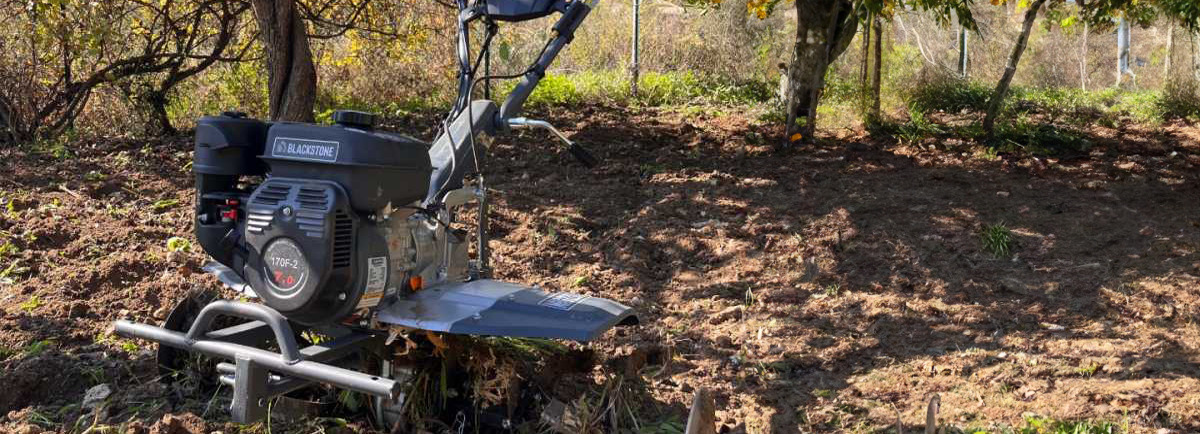
Power till ers and walking tractors are essential tools for those working the land, whether hobby or professional. Although both are designed for working the soil, the main difference lies in their structure and specific functions. In this guide to the maintenance of motor hoes and walking tractors we will look at all the tasks that these machines require during the season.
The rotary tiller is generally a more compact and manoeuvrable implement, suitable for work even on medium-hard soils, to achieve good soil crumbling.
The motor cultivator, on the other hand, is suitable for tilling more tilled soil, allowing better soil refinement for subsequent planting of seedlings.
Over the course of the year, we can divide their maintenance into three main phases:
- Early season maintenance: Work to be carried out shortly before the start of the season;
- Routine maintenance: Work to be done during the season;
- End-of-season maintenance: Work to prepare machines for winter shutdown.

CONTENTS
1. Start-up maintenance at the beginning of the season
Maintenance for the beginning of the season should be carried out just before the start of spring, to prepare the tiller for intensive use. The operations to be performed are:
- Fuel Renewal;
- Changing engine oil;
- Checking, cleaning and possible replacement of the air filter(if cartridge filter);
- Check or possible replacement of dirty oil (if the filter is in an oil bath);
- Checking or replacing the spark plug;
- Inspection of beltsand mechanical components with belt drive;
- Tyre check (for motor cultivators).
1.1 Fuel Renewal
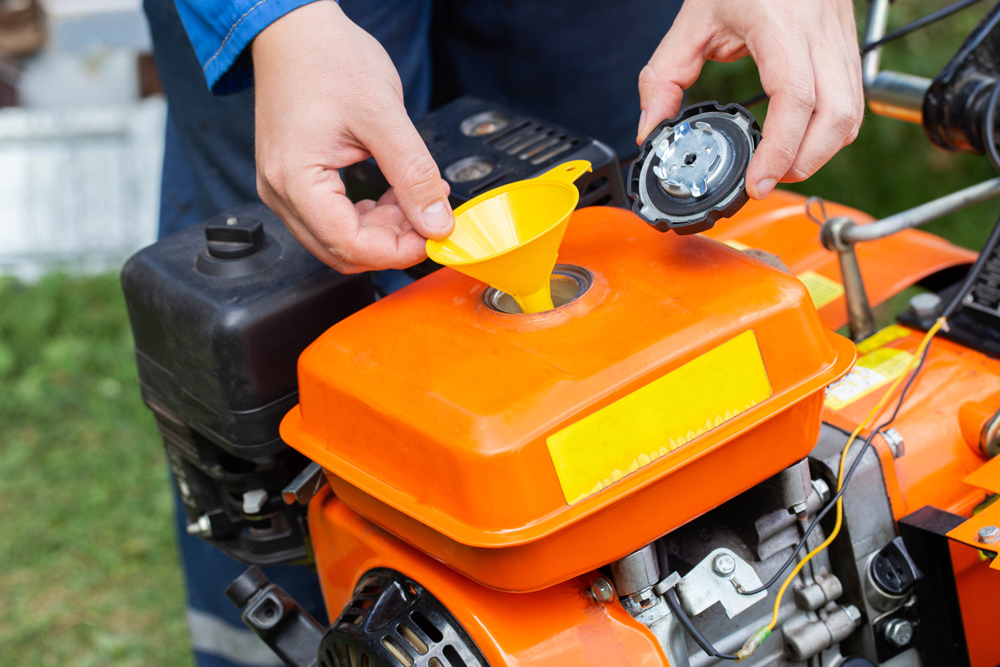
The first step to take is definitely that of renewing the fuel.
With end-of-season maintenance, we will talk about why fuel should not be left in the tank throughout the winter.
If this step is followed, the tank will only need to be refilled at the beginning of the season.
If, on the other hand, you leave last season’s fuel standing for the whole winter, the first thing to do is to replace it with new fuel.
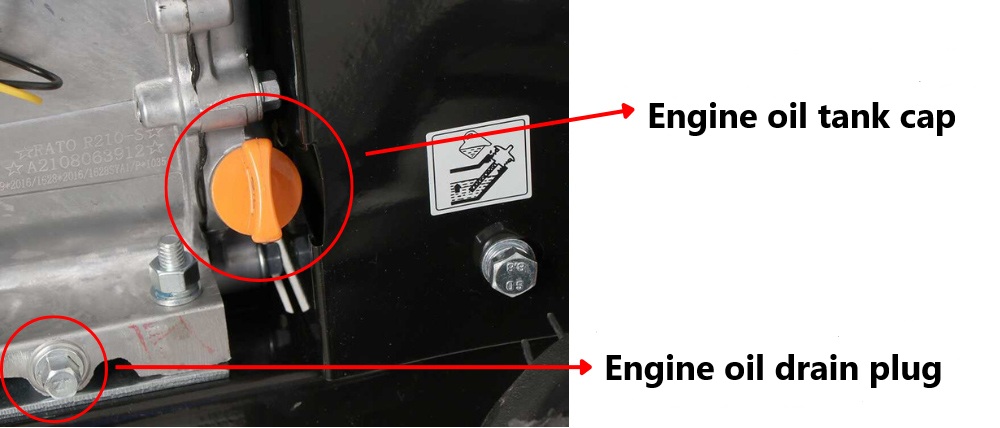
1.2 Changing engine oil
Engine oil is one of the crucial elements for the proper functioning of the machine. If the oil is old or contaminated, engine efficiency is compromised.
To change the oil, remove the drain plug and allow the old oil to drain completely.
When changing the oil, it is essential to use the type of oil recommended in the owner’s manual, as each model of power tiller or walking tractor may require specific characteristics in terms of viscosity and fluid type.
When should the engine oil be changed? As a rule, it is recommended to change it for the first time after a maximum of 8 working hours, thereafter it should be changed about every 50-70 working hours, depending very much on how it is used.
1.3 Checking or replacing the air filter
A clean air filter is essential to keep the engine healthy and protect it from dirt and impurities.
At the beginning of the season you may find the air filter dirty or even damaged:
- In the first case, a thorough cleaning will suffice;
- While in the case of excessive damage it must be changed.
In motor hoes and motor cultivators, then, we can find two different types of air filters:
- Oil-bath air filter;
- Cartridge air filter.
1.3.1 Oil-bath air filter
Unlike conventional filters, the oil bath filter uses a thin layer of oil to capture dust particles and dirt, improving engine efficiency and reducing wear on internal parts.
The filter should be periodically cleaned and replaced if necessary, following the instructions in the instruction manual to avoid a build-up of dirt that could affect engine performance. It is also important to check the oil level in the filter and replace it when it becomes too dirty or deteriorated.
Frequency and conditions of oil change vary greatly depending on the type of terrain being worked.
How to replace the oil-immersed air filter?
- First, the protective casing must be removed by unscrewing the fasteners on its upper part;
- Exhausted oil must be replaced with new oil;
- Once the operation is complete, the protective casing must be closed again, locking the catches again.


1.3.2 Cartridge air filter
In the case of a cartridge filter, cleaning should only be carried out on it, which can be cleaned either with a small brush or with the air jet of a compressor.
If the filter is damaged, however, it must be replaced.


How to replace the cartridge air filter?
- First, the protective casing must be removed by unscrewing the fasteners on its upper part;
- The filter must be removed from its housing and replaced with a new one;
- Once the filter has been replaced, the protective casing must be closed again, locking the catches again.
1.4 Checking or replacing the spark plug
Using spark plugs that are clean and in good condition makes starting the engine quick and easy, which is why they should be checked at the beginning of the season to make sure they are in good condition and do not need replacing.
After the standstill period, two situations can occur:
- If you find the spark plug slightly dirty or with a few deposits after the downtime, simply clean it.
- If the spark plug is found to be excessively damaged or in poor condition, it must be replaced.


To clean them effectively, a special brush with steel bristles and a special spark plug cleaner spray should be used. During this operation it is important not to concentrate on cleaning only the spark plug specifically, but also the area around it, in order to prevent residue and impurities from ending up in the combustion chamber once it has been removed.
How to clean the spark plug?
Oil residues and dirt must be removed from the housings, and a brush with steel bristles must be used for the threads to remove most of the residue.
How to replace it instead?
Replacing a spark plug is not a very complex procedure, but there are still some very precise steps to be followed, which for the inexperienced could be a major obstacle.
Let us therefore see what the main steps are for checking the condition of a spark plug and replacing it if necessary:
- First the spark plug, which is located near the engine compartment, must be identified;
- Remove the spark plug with the appropriate jointed spanner. To unscrew the spark plug, an anti-clockwise movement is required.
The spark plug, especially if it has never been unscrewed, will present a slight resistance to the action of the spanner. At this stage it is important to make a firm but not too forceful movement, otherwise you risk breaking the top of the spark plug; - Once removed, it can be replaced with a new spark plug.
- Once the new spark plug has been inserted into its seat, an initial manual rotation is carried out and then the spark plug is tightened correctly using the jointed spanner. Also for the re-insertion phase, it is important to ensure that the spark plug is inserted correctly, in order to avoid serious damage to the engine.
1.5 Inspection of belts and mechanical components
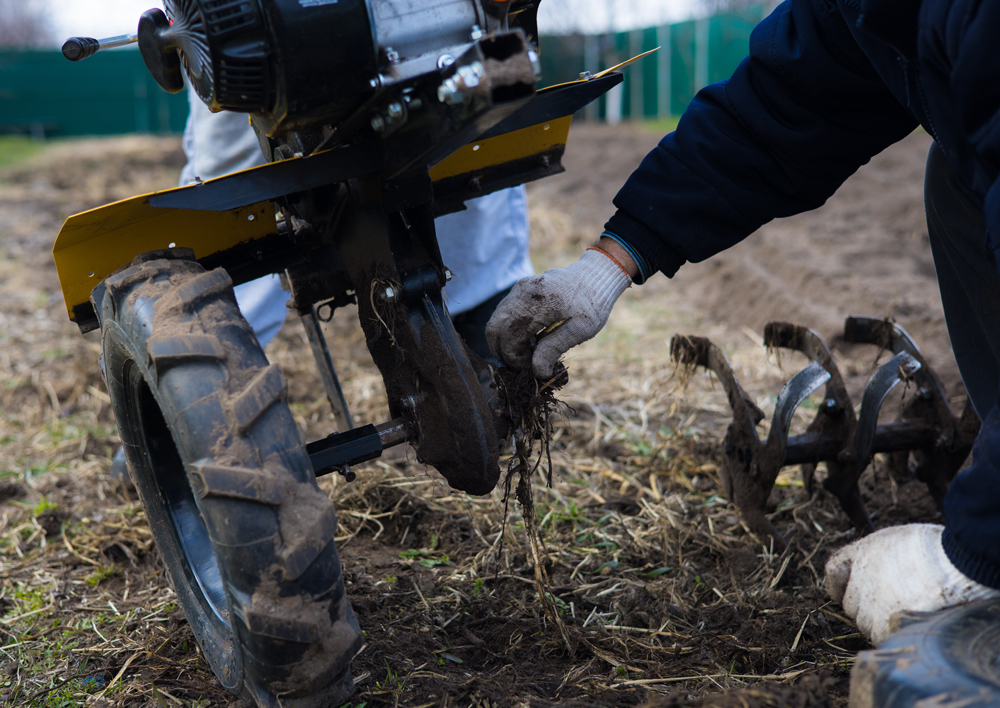
Tiller belts must be checked for looseness or damage.
If they are worn, it is essential to replace them to avoid future failure. Also check any pins or bolts that may have come loose and proceed with their replacement.
1.6 Checking tyres (for motor cultivators)
Finally, there is the state of tyre inflation and flattening to be checked.
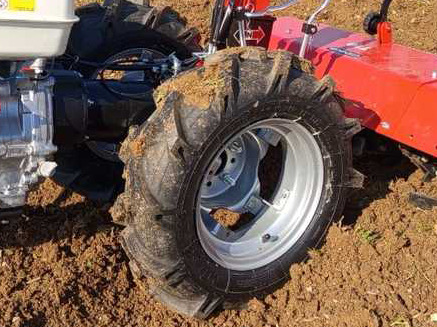
When the motor cultivator is stationary for long periods, especially during winter storage, it is possible for the tyres to deflate and flatten in the area that is in contact with the ground.
This phenomenon can be caused by the weight of the machine bearing down on the tyres, creating permanent deformation in the tread.
This damage is most evident when the implement has been stationary for more than a few weeks, as the internal pressure tends to gradually decrease.
2. Ordinary Maintenance
This phase includes simpler but nevertheless crucial operations for maintaining the good condition of the tiller.
- Checking the condition of the air filter (cartridge or oil bath);
- Checking the state of the spark plug;
- Check engine oil level;
- Checking the transmission oil level;
- Cleaning the machine body and cutter compartment;
2.1 Checking the Air Filter Condition
A dirty or clogged air filter not only reduces engine performance, but can also damage the engine in the long run, as it prevents proper air intake and causes an unbalanced fuel-air mixture.
Tip: the air filter should be replaced every 100-150 hours of use or at least once a year, but this interval may vary depending on the conditions of use and the type of environment in which the vehicle is used.
If the motor cultivator or rotary cultivator is used in dusty or humid environments, the air filter will need to be checked more frequently and replaced before reaching 150 hours of operation.
2.2 Checking engine oil levels

Make sure the engine oil level is always correct, an insufficient oil level can cause increased engine wear, while too much oil could lead to leaks or damage other engine parts.
To check the oil level, you must use the dipstick on the engine, clean it thoroughly and then pull it out to read the oil level. It is important to perform this check regularly, particularly before each use, to ensure that the oil is in the optimum quantity and quality. If necessary, the engine oil should be topped up or replaced according to the instructions in the owner’s manual, using the type of oil recommended by the manufacturer to avoid engine damage.
How often should the engine oil level be checked? It is advisable to check the oil every 10 working hours.
Switch off the motorhoe or walking tractor and wait at least 10-15 minutes. You have to visually check the level if the nozzle is present, otherwise you check it with the dipstick.
2.3 Checking the transmission oil level
The transmission is the heart of the engine movement that transfers energy from the drive part to the wheels or hoes, so proper lubrication is essential to reduce component wear and prevent serious failures.
In general, transmission oil must be checked regularly, as with use it can lose its lubricating properties and accumulate impurities that compromise system efficiency.
Tip: It is advisable to change the transmission oil at least once a year or after a specific number of operating hours, depending on the manufacturer’s instructions.
2.4 Cleaning the machine body and cutter compartment
After each use, or at least regularly, it is always best to clean the machine body and cutter compartment to remove soil, debris or vegetation residue that may accumulate over time.
Use a brush to remove coarse debris, then clean with a damp cloth.
Avoid using direct water jets, as they could damage electrical or mechanical components.
3. Storage Maintenance
Shortly before the end of the season, the machines must be prepared for storage and preservation during the winter. During this phase, they must be thoroughly cleaned, checked for damage and prepared so as not to be damaged by inactivity.
- Thorough cleaning of the machine;
- Fuel drain;
- Spark plug maintenance;
- Storage.
3.1 Thorough Cleaning of the Machine

Before storing the tiller or motor cultivator for storage, make sure to properly clean the tiller compartment and all the various components.
Remove all soil and plant residues from the blades and machine body, this will prevent rust and mould growth during downtime.
At this stage of maintenance, it is important to focus on a more thorough cleaning, as storage will then take place.
3.2 Fuel Drain
During the idle period, it is recommended to empty the tank and carburettor.
In fact, petrol sitting for long periods and especially if exposed to large temperature changes, creates condensation.
This water then mixes with the fuel itself and is the main cause of fouling, which adds up to a natural build-up of deposits in the fuel that compromises its quality.
To make sure there is no more fuel left, leave the machine running until it is switched off.
If you want to store it in the car instead, additives must be used throughout the winter so that these residues do not accumulate.
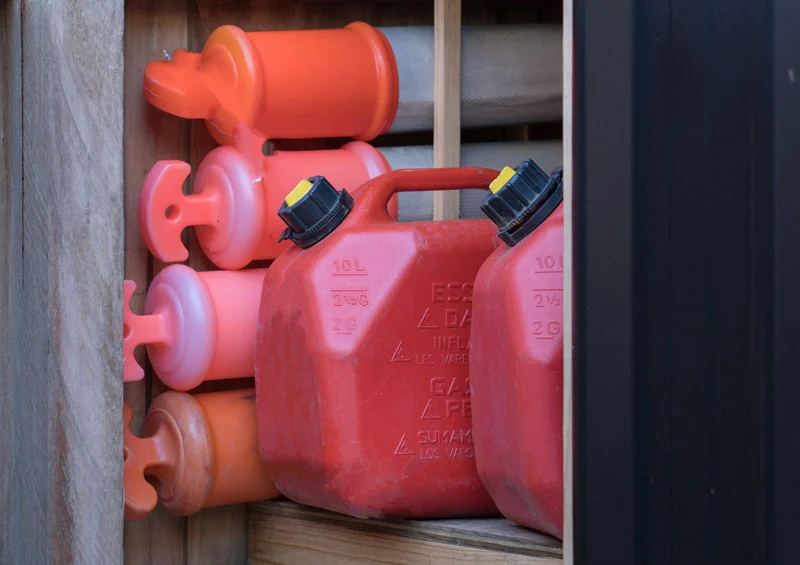
For the proper storage of fuel, special canisters made of thick plastic are commercially available to prevent accidental holes and coloured red to prevent light penetration.
3.3 Spark Plug Maintenance
In the case of a machine with an internal combustion engine that will be stationary for a long period, such as the winter season, there is a useful and recommended maintenance operation.
Once the spark plug has been removed, it is advisable to pour a teaspoon of oil into the spark plug compartment.
3.4 Storage
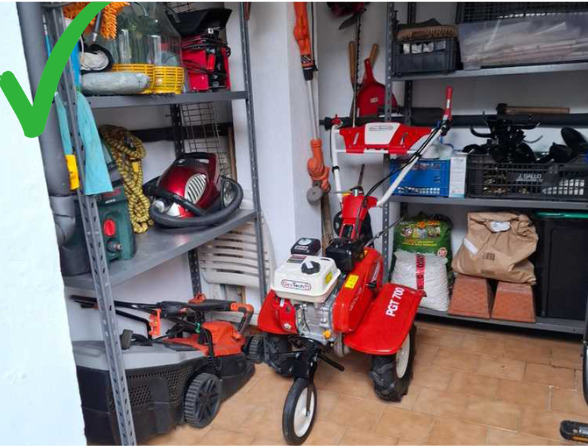
When storing your power tiller or motor cultivator, make sure you put them in a dry place, away from humidity and extreme temperatures.
If possible also use a cover to protect the machine from dust and dirt.
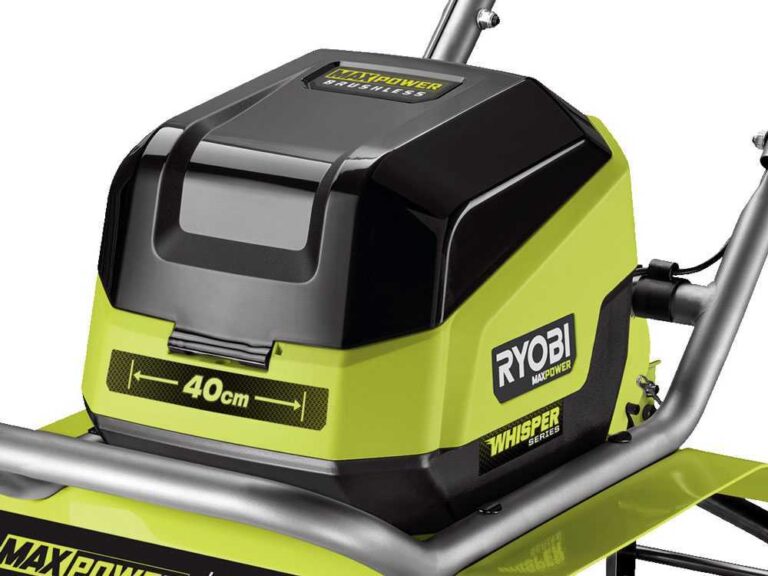
4. Specific Interventions for Electric and Battery Powered Hoes
Electric and battery-powered motor hoes offer many advantages, including zero emissions and simplified maintenance compared to petrol-powered models, at the expense of less power.
Even these categories, although at a much lower level, require maintenance to ensure optimal operation throughout the season.

In this chapter, we look at the maintenance work to be carried out to keep electric and battery-driven motor hoes in perfect working order:
4.1 Checking Electrical Connections (for electric models)
Electric and battery-driven motor hoes are powered by a system of electrical connections that must be monitored regularly to avoid malfunctions.
- Check cables and wires: Check the power cables and wires for damage or wear.
Broken or damaged cables could interrupt the power supply to the motor, so replace them immediately if there is a problem. - Checking the switches and buttons: The power switches and control buttons must function properly. Make sure they are not blocked, damaged or show signs of wear.
4.2 Battery Checking and Maintenance (for battery-powered models)
The battery is one of the most delicate components of battery-powered models and it is essential to treat it correctly to ensure a long service life. Here are the main tasks to be performed:
- Charge check: Before each use, it is important to check that the battery is fully charged. If the battery is removable, remove it and check the charge level. Only use the charger supplied with the product to avoid damage to the battery.
- Checkingthe condition of the battery: Check the battery for signs of visible damage, such as cracks, swelling or leakage.
- Cleaning the battery contacts: The battery terminals may accumulate dust or oxidation, use a soft, dry cloth to clean them gently.
4.3 Electric Motor Maintenance (for battery-powered models)
The electric motor of a cordless tiller is generally maintenance-free, but it is still important to perform some periodic checks:
- Check the cooling fans: The electric motor needs an efficient cooling system to avoid overheating during use. Check that the cooling fans are free of dust, debris or dirt. Clean these areas regularly to promote proper ventilation of the motor.
- Lubricationof moving parts: Although the electric motor does not require as complex lubrication as internal combustion engines, it is still useful to lubricate moving parts, such as drive gears and blades, to keep them smooth and friction-free.
5. What is needed for maintenance?
Materials:
- Engine oil
- Replacement air filter
- Replacement spark plug
- Fresh fuel
- Battery (if present)
Tools and utensils:
- Spanner for belts
- Cleaning brush
- Screwdriver and spanners
- Oil change pump
- Tools for adjusting straps
Clothing and PPE
- Protective gloves
- Safety glasses
- Hard-wearing workwear
- Safety shoes
6. Frequently asked questions from our customers
he frequency of oil changes depends on the use of the engine. In general, it is recommended to change it at least once a year or every 50-70 hours of use. If the work is particularly intensive, consider doing it more frequently. The owner’s manual will give you more precise indications depending on the model.
Cultivators are designed to work in soils of medium consistency. Using them on soils that are too muddy can impair performance. If the soil is too wet, you risk doing more harm than good, as the blades can become clogged. In such cases, it is best to wait for the soil to dry out a little before proceeding.
It is best to clean the blades thoroughly and apply a lubricant or anti-corrosion agent before storing them for the winter. Also, store them in a dry place to prevent moisture.
If oil changes are neglected, the engine can suffer serious damage over time, compromising efficiency and durability.